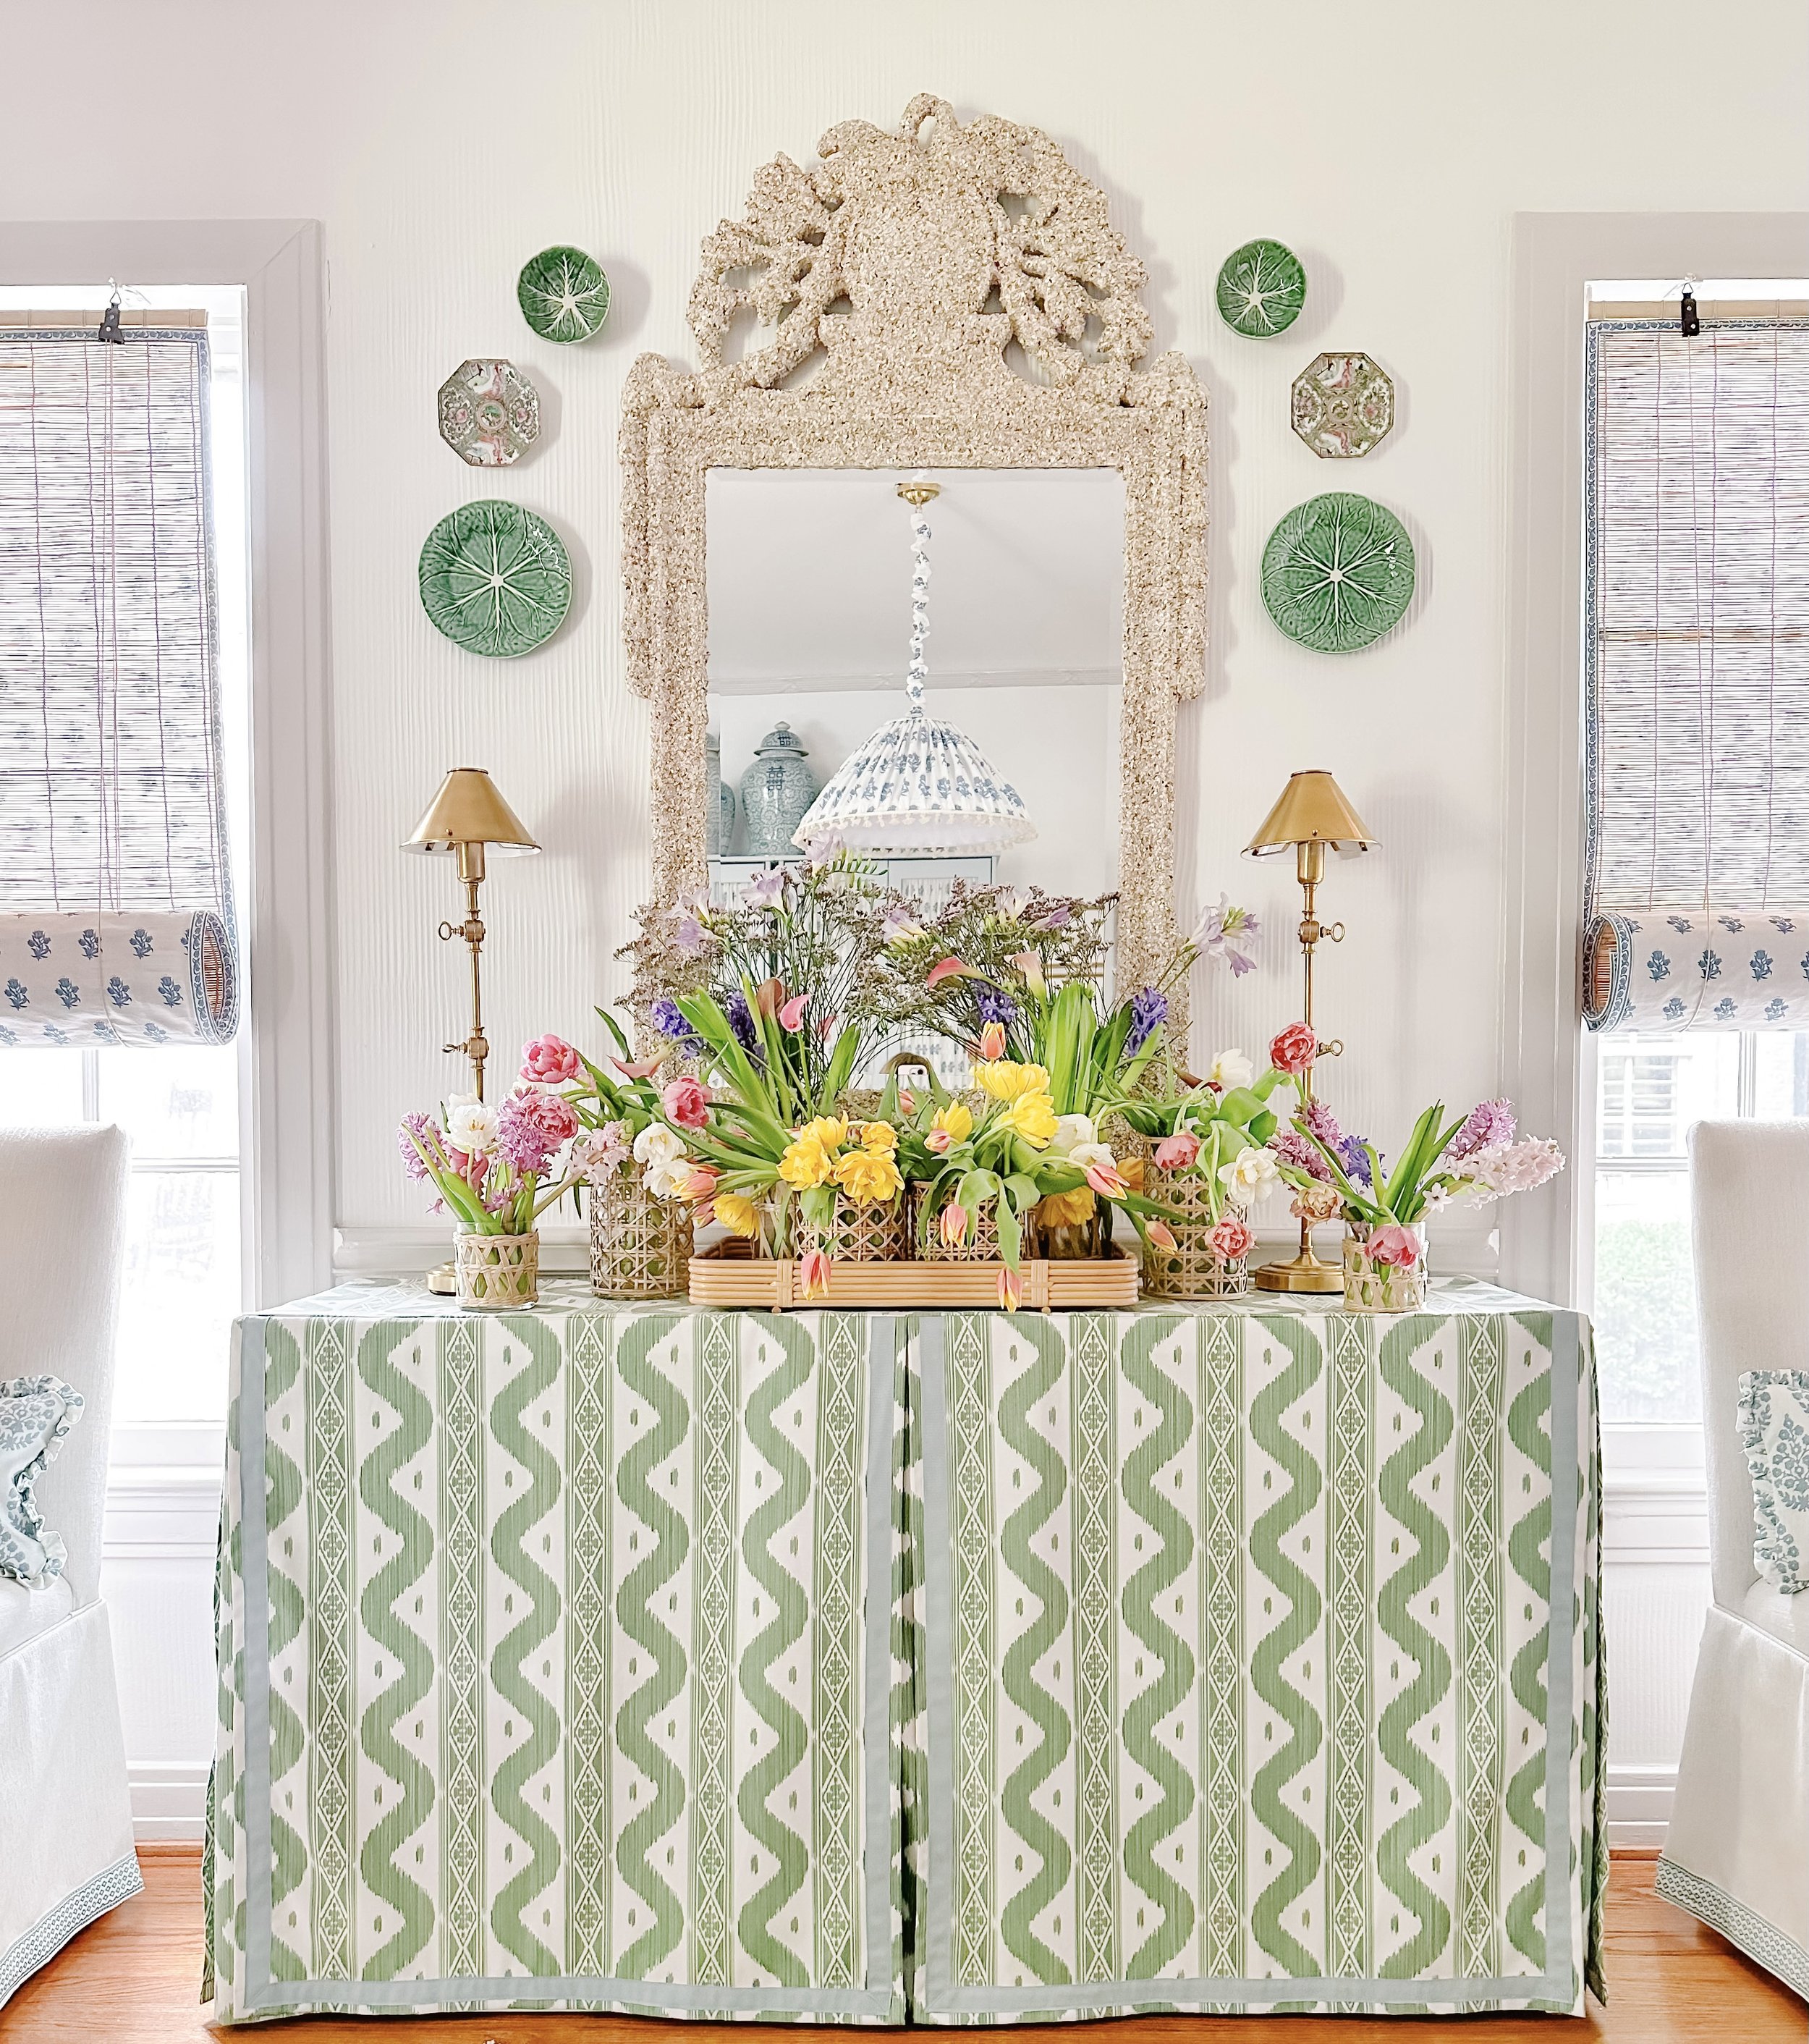
Learn how to create your own console skirt without sewing!
No Sew Console Skirt
Learn how to create a beautiful console skirt without sewing!
-
-
Here I’ll walk you through everything you’ll need to complete the project.
-
Using the Mrs. Alice Ikat Stripe
Here I talk through all the important points to consider when choosing to use this fabric for your project
Here I talk through all the important points to consider when choosing to use this fabric for your project
-
Notes on Choosing Your Own Fabric
Here I talk through what to look for when picking your own fabric for this project.
Here I talk through what to look for when picking your own fabric for this project.
-
Squaring Off the Fabric
Here I show you how to square off your fabric to ensure straight cuts and measurements.
See PDF for additional instruction.
Here I show you how to square off your fabric to ensure straight cuts and measurements.
See PDF for additional instruction.
-
-
-
The First Panel - Find the Squiggle!
I’ll walk you through how to measure the fabric for our first panel - first we’ll find the center of the center squiggle!
I’ll walk you through how to measure the fabric for our first panel - first we’ll find the center of the center squiggle!
-
The First Panel - The Width
After finding the center point of the fabric for the console’s center we work backward to find the width of one panel
After finding the center point of the fabric for the console’s center we work backward to find the width of one panel
-
Here we find the height of our first panel
-
-
-
Here I show you how to cut the fabric to reduce bulky corners.
-
Ironing Seams & Applying Stitch Witchery
I’ll show you how to prep seams for adhesive (stitch witchery)
I’ll show you how to prep seams for adhesive (stitch witchery)
-
Here’s a quick way to jump start the melt!
-
Double Checking Your Measurements
I like to hold my panels up to the Kallax as I complete them to make sure everything looks good!
I like to hold my panels up to the Kallax as I complete them to make sure everything looks good!
-
-
-
The Right Panel
Please watch this video before you cut the height on the right panel as you will likely have to shift the fabric up to match the pattern on the left panel!
Please watch this video before you cut the height on the right panel as you will likely have to shift the fabric up to match the pattern on the left panel!
-
Measuring and Cutting the First Side Panel
-
The Center Panel - Width
We do the same shifting of the fabric here (like we did with the right front panel) to ensure pattern alignment with this piece across both front right and left panels.
We do the same shifting of the fabric here (like we did with the right front panel) to ensure pattern alignment with this piece across both front right and left panels.
-
The Second Side Panel
A quick video because you can just align the fabric to be cut with the first side panel we’ve already cut. Just ensure that you account for the pattern alignment and shift the fabric up or down accordingly.
A quick video because you can just align the fabric to be cut with the first side panel we’ve already cut. Just ensure that you account for the pattern alignment and shift the fabric up or down accordingly.
-
Corner Panels
The corner panels will split most of the remaining fabric in that section. They will also need to be shifted down to align with the pattern on the side panels.
The corner panels will split most of the remaining fabric in that section. They will also need to be shifted down to align with the pattern on the side panels.
-
Top Panel - Width
We’re going to be measuring up from the bottom of the remaining fabric for this piece.
We’re going to be measuring up from the bottom of the remaining fabric for this piece.
-
Top Panel - Height
The most important thing to remember when measuring this piece is getting the height right while taking into account the 1/2” overlap with the front left and right panels all the while ensuring the pattern matches with these.
The most important thing to remember when measuring this piece is getting the height right while taking into account the 1/2” overlap with the front left and right panels all the while ensuring the pattern matches with these.
-
-
-
Ribbon Overview
Only 2 steps left to go - applying ribbon and adhering the panels to each other! Wanted to quickly show you what the skirt looks like before it’s assembled!
Only 2 steps left to go - applying ribbon and adhering the panels to each other! Wanted to quickly show you what the skirt looks like before it’s assembled!
-
Adhering the Ribbon
Use the ruler to work in sections to avoid using pins which leave noticeable marks behind in the fabric.
Use the ruler to work in sections to avoid using pins which leave noticeable marks behind in the fabric.
-
Creating the 1st Corner
Here I show you how to fold the ribbon back on itself and then across to create a corner and continue using the same piece across the bottom width.
Here I show you how to fold the ribbon back on itself and then across to create a corner and continue using the same piece across the bottom width.
-
Creating the 2nd Corner
The second corner should mirror the first and I’ll walk you through that here quickly.
The second corner should mirror the first and I’ll walk you through that here quickly.
-
Here I show you how to secure the top part of the corners that is loose!
-
-
-
Assembly Overview
Just a quick overview of the process of layering the panels onto the top panel to create the skirt.
Just a quick overview of the process of layering the panels onto the top panel to create the skirt.
-
Adhering the Front and Side Panels
Using pins here to ensure we maintain 1/2” overlap of the top and front panels.
Adhere the side panels here as well using the same method as listed above.
Using pins here to ensure we maintain 1/2” overlap of the top and front panels.
Adhere the side panels here as well using the same method as listed above.
-
Layer 2 - Adhering the Center Panel
Lining up the center panel left to right and bottom - you can fudge the top here to ensure the bottom of the panel is aligned with the two front panels.
Lining up the center panel left to right and bottom - you can fudge the top here to ensure the bottom of the panel is aligned with the two front panels.
-
Layer 3 - Completed Corner
Here I show you what a finished corner looks like before we start cutting!
Here I show you what a finished corner looks like before we start cutting!
-
Layer 3 - Adhering the Corner Panels
I’ll show you how to notch the corner panel fabric at a 45 degree angle to be able to adhere it to both the side and front panels.
I’ll show you how to notch the corner panel fabric at a 45 degree angle to be able to adhere it to both the side and front panels.
-
It’s time to sit back and admire your work!
-
Learn how to create your own console skirt without sewing!